Ellen Kaspern’s Elegant Twig Lantern
This project is packed with details and joinery exercises
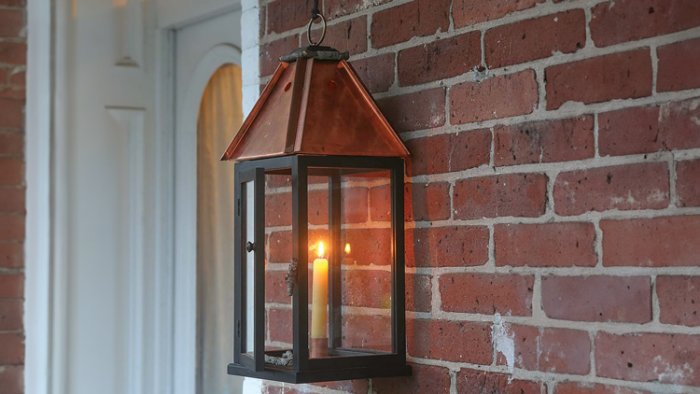
In 2017 I was invited to be part of a show with The Trustees of Reservations and the North Bennet Street School. Thirteen NBSS graduates were invited to make a piece inspired by one from The Trustees’ collection. The piece I chose was a 1930s table made entirely of twigs; it came from a camp that was at the Lyman Reserve in Massachusetts. Since the table was part of a camp and the lantern is the North Bennet Street symbol, making a lantern seemed appropriate. This piece has mortise-and-tenon case construction with glass panels and an inset door. The top is made of bent copper, and the case sits on a base that has a dovetail slide for the candle.

Start the case joinery with grooves
 |
 |
I begin by cutting a groove in the posts and rails at the router table using a straight bit. The groove will be run on the edges of the posts and rails that will hold glass. The back posts get two grooves, as they will hold two panes, but the front posts only get one groove.
 |
 |
This groove will eventually become a rabbet (to hold the glass and stops). I run a groove first so there is less wood to remove when making the rabbet. By doing the groove first on the case posts, I do not have to raise the router bit as high when plunging, which I feel is a safe way to perform that operation.
Mortises on the router table, tenons on the table saw
With the exception of the front posts, the end of each post gets a mortise. (There is no rail between the bottom front posts, so they don’t get mortised.) By running the grooves first, I can use the same setting on the router table to cut all the mortises in the posts. I set stops on the router table to cut the mortises so I can plunge and push to a stop.

Next, at the table saw, I cut the tenons on each end of the rails and fit each tenon to a mortise.
Convert grooves to rabbets
Once all the grooves, mortises, and tenons are cut, I convert the grooves to rabbets at the router table. This is a plunge and push to the stop cut on the router table, because I do not want to cut where the mortises are. By running the grooves first, I do not have to raise the cutter as high when I’m cutting the rabbets. This helps when plunging and pushing to a stop. To make these cuts, I use a straight bit and an auxiliary fence. Finally, I use a marking gauge and chisel to remove the rest of the rabbets by hand.
Glue the posts to the rails

A typical case has four sides; however, this case has three sides and a hinged door. I assemble the case in stages. I glue up one side, then the opposite side. Once those assemblies are dry, I attach them to each other at the back by gluing a top and bottom rail to them.

At the same time, at the front, I glue a top rail between the sides and add a spacer piece at the bottom of the front section. The spacer piece makes sure the front and back are square. The spacer is milled with the rails and will have shoulders cut on each end using the same setting as the tenons.

Make and assemble the door
The inset glass door has offset shoulders. At the router table again, I cut mortises in the stiles before moving to the table saw to run a rabbet on the rails and stiles. The rabbet holds the glass and wooden stops.
I run the rabbet in a spacer block at the same setting as the rabbet on the grooves and the stiles. Then I use the spacer block to do the offset shoulders on the table saw so that they turn out perfectly.
With the rabbet in the spacer, I cut the offset shoulders with a dado set on the table saw using the spacer clamped to the rip fence, first with the rabbet not engaging the rail and then flipped so the rail runs against the rabbet to create the offset. Once the joinery is cut, I glue the rail and stiles together. After that assembly dries, it’s time to tackle hinging the door to the case.
I cut the hinge mortises on the door and case by hand using a marking knife, marking gauge, and chisels. I cut the mortises on the door first and set the hinges on the door. Then I place the door onto the case and transfer the placement of the hinges. Once the hinges are set, I hand plane the door to have a consistent fit and reveal inside the case. This requires taking the hinges on and off the door a few times. Since the case is stained black, I blacken the hinges using Super Blue.
A base with a slider

The base of the lantern is a solid piece of wood that overhangs the case on all sides. It is attached to the case with sloppy screw slots to allow for expansion and contraction.
 |
 |
For easier access to the candle holder, I add a dovetailed sliding component to the bottom using a dovetail router bit and a handheld router to remove the wood. I use the same router bit in the router table to make the solid dovetail slide. Later I will attach a twig pull to the dovetail slide, which will also serve as a stop for the door.
Finish first
The case is mahogany, made from scraps from another job. It can easily be left bare, but I decide to stain it with black leather polish. I find the mahogany grain and pore structure lends itself well to being stained with black polish. The finish is General Finishes Arm-R-Seal.
A frame for the roof

For the roof, I start by making a sturdy frame for the copper to be attached to. The frame joinery is a bridle joint. The bottom of the frame will not be seen, and I bevel all four sides at the table saw to create the angle I want for the top.

I cut the joinery on the table saw using a dado set. To cut the mortises, I use a hand screw that rides on the rip fence while holding the short piece upright. A feather board keeps the piece tight against the fence. (You also could use an over-the-fence tenoning fixture.) The tenons are cut lying face down on the table saw.
The copper topper
A PDF template for the copper roof can be found here.
 |
 |
The four copper panels get cut to shape, wrapped around the bottom of the frame, and attached with screws. I outline the template onto the copper with a knife and then cut out the shapes on the bandsaw. Copper is very soft and can be cut with a standard blade. I use a general-purpose 4–5-tpi blade, being sure to wear a respirator and to vacuum up any metal debris left behind.
 |
 |
After cutting the copper to the pattern, I bend the copper on a shopmade brake made of plywood and hinges. I use a knife to score the copper anywhere I will be folding. I line up the fold line on the copper with the seam in the brake, and then I clamp the copper in place and clamp the brake to the bench. I fold the brake at its hinges, which bends the copper past 90°.

After removing the copper from the brake, I put the bent edge in my vise with a piece of plywood. The plywood is slightly lower than the copper, and it helps to pinpoint the pressure on the copper when I turn the handle of my vise to bend the copper flat back on itself. Next, I put this folded edge back in the brake and bend it in the brake again. I do not put the second fold back in the vise to fold it flat.
 |
 |
There are two tabs per panel, one at the top and one at the bottom. Because it’s an easy 90° fold, I simply score the fold line on the tabs, set them in my bench vise with the score line at the top of the vise, tighten the vise, and fold the tabs.

At the drill press with a Forstner bit, I drill one hole in each copper panel to create air vents for the candle. The panels are attached to the bottom of the frame with screws. I use #4 by 3/4-in. panhead screws so I don’t have to countersink into the copper. The screws are driven near the edge of the copper, thus allowing the copper to still sit flush on the case.
Roof pieces are gathered together
Two square wooden pieces (a decorative top block and a support block that sits inside the roof at the top) hold the copper tabs at the top of the roof together. I find the center of both pieces by marking an X. I drill holes in the decorative top piece for the metal hanging ring and nut.
|
|
|


With blue tape I mark the front edge of the two pieces of solid wood and the front face of the copper. This allows me to always reference the front on all pieces.
First, I line up the front of the inner block and the front of the roof and drill through the copper tabs and into the bottom inner block. I place the inner block on top of a supporting block of wood that is the same height as the copper roof. Then I place the roof on top of the inner block, making sure the center of the support block is in the middle of the copper tabs. I drill through each copper tab and into the top of the inner block. I remove the inner block and continue drilling holes through it. Then I place screws through the bottom of the inner block, leaving them slightly protruding.
 |
 |
 |
 |
 |
 |
To transfer the location of the screws to the decorative top block, I put the inner block back under the tabs and have the screws protrude out of the holes in the copper. I position the decorative top over the copper tabs and press firmly into the protruding screws to leave an impression. Using those marks, I drill holes into the bottom of the decorative top. I attach the metal hanging ring into the wooden top, place the decorative top back on the copper tabs, and screw through the bottom of the inner block through the tabs and then into the bottom of the decorative wood topper.

Install the glass

Once the copper top is assembled, I mark and drill the case for the three screws, one on each side and the back, that hold the roof to the case. However, the roof isn’t attached to the case until the glass is in place. I need to be able to maneuver without the roof to install all the glass.
With a countersink bit, I drill under the top rails on each side and the back of the case. The screws that attach the copper top to the case go through the top rails and get covered by the stops. I install the glass before I attach the roof, but I tack in those last two stops after the roof is screwed in place. I position the copper top upside down, with the case also upside down and centered on the roof, and then place an awl into the screw holes to mark where to drill into the copper top. I drill holes into the copper roof for the screws.

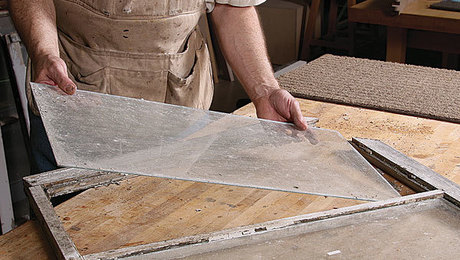
The glass is held in place with thin wooden miter strips. I miter each of those stops using a 45° sled on the table saw, and I attach the stops to the case side and door frame with a pin nailer.
When installing the glass, I start with the pane that goes into the back of the case. I set the glass in the back of the case and then put in the stops. I use 1/2-in. 23-gauge pins to secure the stops to the case, with three pins in the side stops and two in the top and bottom. After the back glass is in, I install the glass on each side of the case. (My pin nailer is just small enough to fit in the case.) I install the glass in the door before my final installation of the door to the case.
The case gets a roof and some final touches

It’s finally time to secure the roof to the case. After placing the copper top on the case, taking care not to scratch or break the glass, I screw the two pieces together by hand. The screws must be completely countersunk or the final three stops will not fit properly. I secure the last three stops in place.
|
|
|


To hold the candle, I nail a copper candle holder to the slide. My friend Nicholas Ventola made the candle holder shown here by soldering a piece of copper pipe to a piece of copper. (I could also have used a copper pipe cap for plumbing or purchased a similar copper candle holder from The Floral Society.) I also add the twig that serves as the pull for the slide as well as the door stop. Then I attach a knob to pull the door open and a twig for a door latch.
Ellen Kaspern is a faculty member in the cabinet and furniture making program at the North Bennet Street School in Boston.
Fine Woodworking Recommended Products
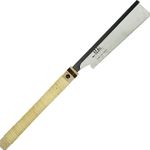
Suizan Japanese Pull Saw


Log in or create an account to post a comment.
Sign up Log in